Let’s crack out our schematic-reading skills and take a look at a seemingly straightforward washer lid lock circuit.
Notice that, while they give us labels for the pins, that’s basically all we’ve got as far as specs or info about the control board’s algorithm. So if we want to figure out how this circuit works during operation, we’ll have to crack out some Circuit Fu™. That means using both our understanding of electricity and our understanding of the intended function of a lid lock to deduce how the circuit must work.
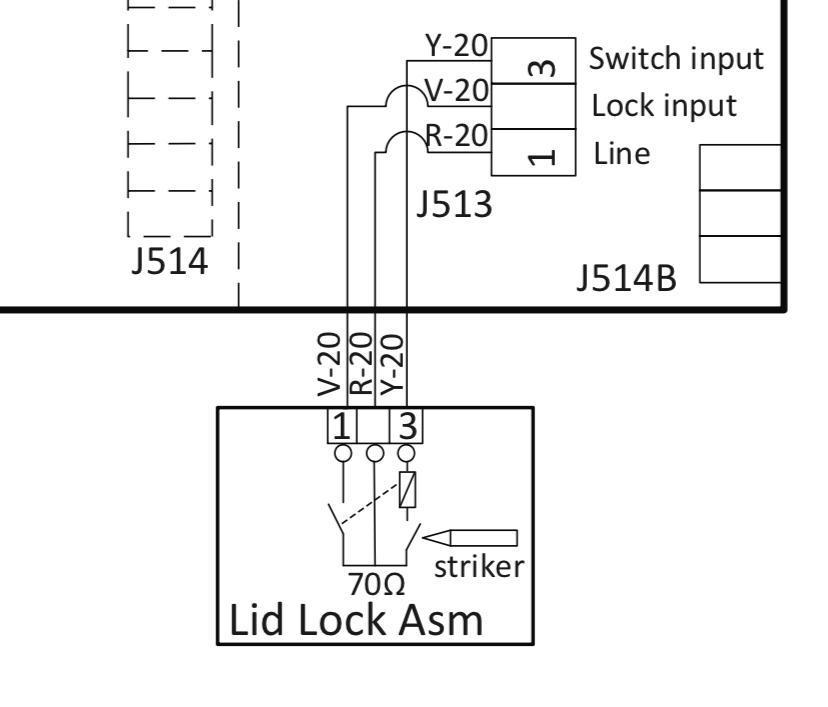
When the machine is in standby and the lid is open, this is what the circuit would look like:
Intuitive enough — you have Line supplied to the circuit from J513-1, but it’s just standing at those open switches. There’s no complete circuit for that voltage to drive current through.
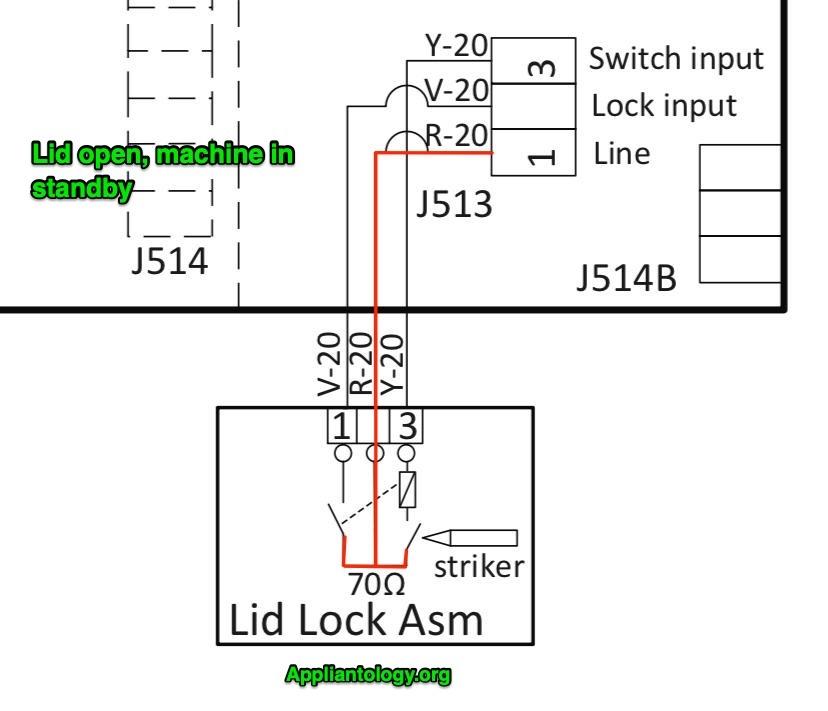
Let’s take a look at what happens when the lid is closed. Note that the “striker” is just what it seems — that’s the tongue sticking down from the lid. It actuates the switch it’s pointing at in the schematic by physically pushing down on it when the lid is closed.

Okay, so now the lid is closed, and the striker has closed the right-hand switch. Now, we have Line present all the way up to J513-3.
Pop quiz: how much current is now going to be flowing through that wire?
None? Wow, spot on! Didn’t know you were sharp like that. There’s no neutral supply to the circuit yet, and therefore it’s not a complete circuit. No current can flow yet.
So what does Line voltage being present at pin 3 accomplish, then? It lets the control board know that the lid is closed. In other words, it’s a sensing line. The control has a little voltage sensing circuit set up at that pin, and it’s constantly poling it to see if Line is present. Once it senses Line, it knows that the lid is closed
Next up: what happens when the customer starts a cycle?
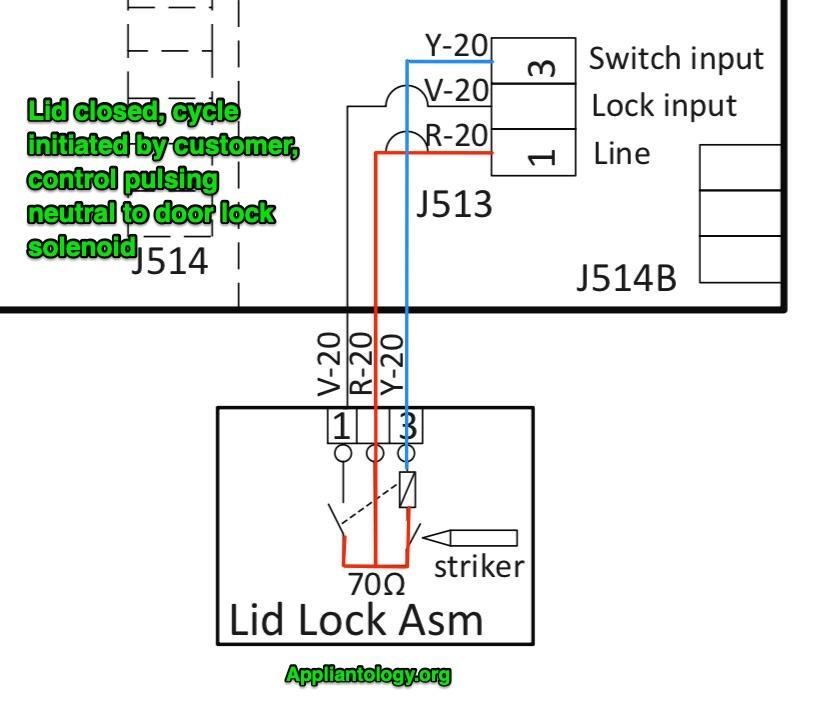
Suddenly, that sensing line at pin 3 isn’t just a sensing line anymore — it’s a Neutral supply! What’s happening here?
First off, that rectangle just above the lid switch is the lid lock solenoid. When that solenoid is energized, it actuates the left-hand switch — the one it’s connected to by a dashed line. Here’s a tricky bit about this that you only get from being familiar with this kind of lid lock technology: the control only supplies Neutral to the lid lock solenoid for a short moment. It’s just a quick pulse, and then the Neutral supply is gone again. This is because the lid lock switch that the solenoid actuates is a toggle switch. Give the solenoid a pulse of power and that switch pops closed. Give it another pulse, and it pops open.
So the circuit will only be in the state as shown above for a fraction of a second, but that’s plenty long for the solenoid to do its job and actuate the other switch. And once that’s done, we’ll have the following state:
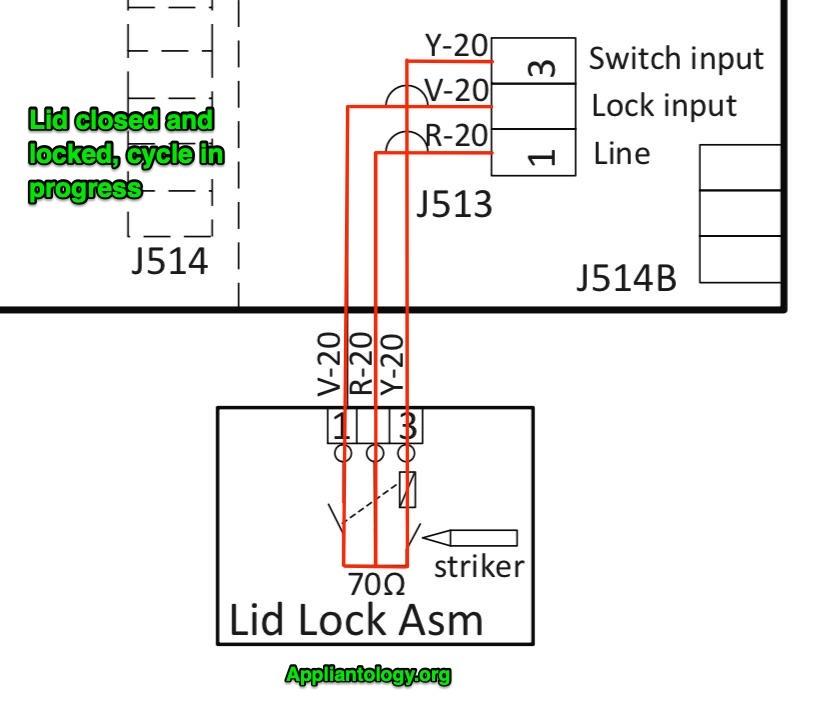
The board has cut off its quick pulse of Neutral to the lid lock solenoid, and the solenoid as done its job: the lid lock switch is closed. And the board can tell that the solenoid has done its job by poling for Line voltage at J513 pin 2 — voltage will only be present there if the lid lock switch is closed.
Now that the lid has been locked and, just as important, the control knows that the lid has been locked, the wash cycle can progress.
Want to learn more about reading schematics and figuring out how circuits like this work? Click here to check out our Core Appliance Repair Training Course right here at the Master Samurai Tech Academy.